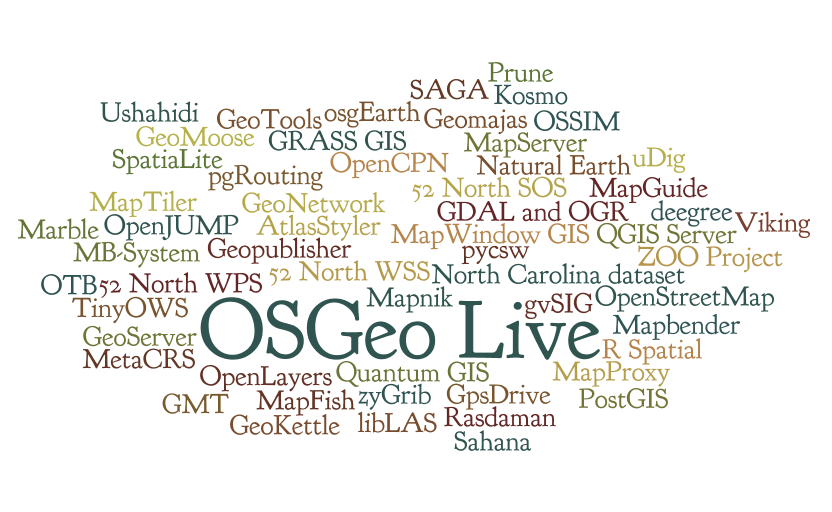
OSGeoLive
About OSGeoLive
OSGeoLive provides bootable ISO-Images and Virtual Machines which allow users to try out fully-operational versions of popular Free Geospatial Software without the need to install a thing.
We do this in large part by maintaining automated build scripts which collect many OSGeo programs and sample data-sets together, and then combine them to form the Live disc or VM itself. By tweaking these scripts, users are free to make their own custom distributions, for example localized in their own language and with local map data.
Key Links
Quick Start
How to add a project to OSGeoLive
Including OSGeoLive at your event
OSGeoLive provides a DVD, USB and a Virtual Machine which allow users to try out fully-operational versions of popular Free Geospatial Software without the need to install a thing. It also includes documentation and a comprehensive presentation.
This is the process to follow if you wish to make use of OSGeoLive at your conference, workshop or similar event.
- Tell Us
- Add your event to our OSGeoLive History page and tell us how you would like to use OSGeoLive on our email list (or email Cameron Shorter directly). Hearing how OSGeoLive is used motivates us to keep going, and we plan releases around upcoming events.
- Presentation
- Conference attendees appreciate the OSGeoLive Lightning Overview, which explains the breadth of OSGeo software, abstract here. It is often presented by one of the conference organisors, or keynote speakers. You may wish to find a suitable speaker from the OSGeo Advocate list. The presentation may be given as is, or modified to align with time constraints, presenter's interest, or conference focus. (For prior variants, see Live GIS Presentation.)
- Handing out USBs or DVDs
- OSGeoLive DVDs and/or USBs are often handed out to all conference delegates, or a smaller number handed out from an OSGeo booth. DVDs are cheaper (around $2 per copy), but USBs provide a better experience as they are faster to boot up and run. You will need to:
- Work out how to pay for the USBs/DVDs. Usually the price is factored into event budgets. This means you will require commitment from the event Organisors. However you may find an external sponsor, or for smaller print runs, you might find volunteers to print from their computers.
- Source a local printer, preferably local. Printers typically require 2 weeks to do the print run, although they often will turn around faster if you pay more money.
- Printing DVDs: The printer will require an ISO image, and artwork for the DVD face and DVD sleeve. You may make use of existing artwork or create your own.
- Printing USBs: A 4 Gig USB is required for osgeo-live-mini (8 Gig if you wish the full image with windows and mac installers). The process for installing USBs is described here. Note that it is important to ask the printer if they can create bootable USBs. (We have found that many printers are not familiar with the process). It is prudent to check the first USB that is printed before printing the rest. You can also print a logo on the USB.
- Workshops
- For workshops, we recommend using OSGeoLive from a Virtual Machine or from a USB. Note that some computers can't boot from a USB. OSGeoLive on a DVD is slow and as such is not recommended for workshops. However it is wise to have a few spare DVDs in case one of your computers can't boot from the USB. Note that OSGeoLive we have heard some issues when running on Apple Macs, so if using Macs, please test first.
- Poster
- We have a Poster which is useful for hanging on a wall of a conference booth.
Build Process
- OSGeoLive Build instructions
Want to help?
We love volunteers, and would love to hear from you if you would like to help out. Best place to start is to introduce yourself on our email list, maybe mention how you'd like to get involved. Here are some ideas about things that you might want to help with:
- Translations
- Know another language? Why not join our team of translators:
- http://wiki.osgeo.org/wiki/Live_GIS_Disc#Translate
- Testing
- Quickstarts
- Debian Packaging
Project Management Committee (PMC)
Also referred to as Project Steering Committee (PSC)
Package List
Documentation
OSGeoLive_AddProject#Documentation
Stable release: http://live.osgeo.org
Nightly build: http://adhoc.osgeo.osuosl.org/livedvd/docs/en/index.html
Source is stored in git: https://github.com/OSGeo/OSGeoLive-doc
Jupyter Notebooks
Preview of development Notebooks
Translate
- OSGeoLive Translation Process WIP
- Translation Status on Transifex
- You find the latest Translation Build at: http://adhoc.osgeo.osuosl.org/livedvd/docs/en/index.html (not using Transifex)
- Discussion about moving to Transifex
Live GIS Translate - translate process.Docs ready to translate are marked "Final" in our status spreadsheet.Translation Status
Artwork
You can find the artwork sleeves, background images, booklet at:
Review
Presentation
Poster
Workshops with OSGeoLive
USB Creation
- Quickstart on creating a USB is here: https://live.osgeo.org/en/quickstart/usb_quickstart.html
- Wiki with extra information and tips is here: OSGeoLive Quickstart USB
Schedule
Contact Us
- Mailing List: http://lists.osgeo.org/mailman/listinfo/live-demo
- The mailing list is archived at Gmane and Nabble
- IRC: irc://irc.freenode.net#osgeolive - Logs
- You can log into IRC from: http://webchat.freenode.net/ Enter a nickname, and set channel=osgeolive
- We are meeting weekly on IRC, Monday afternoon in the Americas, Monday evening in Europe, Tuesday morning in Australia/New Zealand: https://www.timeanddate.com/worldclock/meetingdetails.html?hour=19&min=30&sec=0&p1=179&p2=189&p3=224&p4=22&p5=240&p6=196&p7=215
- Twitter @osgeolive
Downloads
Latest Stable Release: http://live.osgeo.org/en/download.html
Latest Development Release: http://aiolos.survey.ntua.gr/gisvm/dev/
Older Releases: http://download.osgeo.org/livedvd
Issue Tracker
Our issue tracker is UNDER CONSTRUCTION nov17 hosted at OSGeo's Trac system, and you will need to create an OSGeo UserId before you can login and edit issues. To distinguish the LiveDVD project from other OSGeo projects, use the following conventions:
- Component field
- Set to `LiveDVD`
- Keywords
- Version: Set to base release version: eg: 5.0, 5.5 (not 5.5rc1)
- Application: Set to application with issue (use lower case): eg: "geoserver"
OSGeo User Id
- Create an OSGeo id: http://www.osgeo.org/osgeo_userid , which is required to edit the wiki, commit to | git and create an issue in the issue tracker.
Git migration
- Repositories
- https://github.com/OSGeo/OSGeoLive and https://github.com/OSGeo/OSGeoLive-doc
- under consideration for moving to OSGeo infrastructure
- Git Background
- Since Git is a distributed versioning system, it is very convenient for each developer/contributor to have a personal public copy of the "official" repository (also known as fork). Web hosting services like GitLab or GitHub provide this option. By forking this way you can make changes to a personal repository, then you can ask the core developers to review the code and merge accordingly through a "pull request".
- Fork repository
- From https://github.com/OSGeo/OSGeoLive or https://github.com/OSGeo/OSGeoLive-doc select the "Fork" button to create your own fork of these repositories.
- After forking these official repositories, your working repositories are: https://github.com/your_id/OSGeoLive and https://github.com/your_id/OSGeoLive-doc
- Copy your repository locally
- On Linux systems get the source code locally using:
git clone https://github.com/your_id/OSGeoLive
git clone https://github.com/your_id/OSGeoLive-doc
- (On MS Windows systems, you can use TortoiseGit, which extends Windows Explorer to include git commands)
- In order to be able to get and send changes to your public git repository, you need to link your local copy to your public copy. This is done automatically for you when you "git clone". The repository that you cloned from has the alias "origin".
- add upstream
- In order to be able to get changes that others do to the main repository, you need to manually link to that using:
git remote add upstream https://github.com/OSGeo/OSGeoLive
git remote add upstream https://github.com/OSGeo/OSGeoLive-doc
- setup git personal details
- The first thing you should do when you install Git is to set your user name and e-mail address.
git config --global user.name "John Doe"
git config --global user.email johndoe@example.com
- Commit access
On the git world, you don't need commit access to the main repository in order to contribute. You just work on your own fork and ask maintainers to merge your code through "pull requests". Before you contribute to the project for the first time, you will need to confirm that you will comply with our license guidelines. Write something like:
- "Hi all, I'd like to contribute XXX to OSGeoLive. I confirm that my contributions to OSGeoLive will be compatible with the OSGeoLive license guidelines at the time of contribution."
- The licenses used for the OSGeoLive build scripts and documentation are:
- Creative Commons Attribution-ShareAlike 3.0 Unported License for Quickstarts
- Creative Commons Attribution 3.0 Unported License for Project Overviews
- LGPL version >=2.1 for the install scripts
- One of the OSI approved Open Source licenses for installed applications
- Public domain, CC-By-SA, and Open Data Commons Open Database License (ODbL) for data
- Add your name to contributors list
- The first thing you should do to test your git setup is to add your name to the code contributors or translators list(s):
cd OSGeoLive-doc
# Pull any updates from upstream project (master is the equivalent of subversion trunk)
git pull upstream master
# Coders and creators of new content: edit contributors.csv
# please add your Name, Email, Country and Osgeo_id to the list, separated by comma
#  - Order alphabetical by first name,
#  - remove punctuation from email addresses to stop harvesting for junk mail

# optionally check to see what has changed.
git diff contributors.csv

# add the changes into stage area
git add contributors.csv
# commit changes locally
git commit -m "Added [my name] to contributors"
# send the changes to your public repository
git push origin master
At this point you can let others know that you have some changes that you want to merge, so you can use the button "Pull Request" on GitLab or GitHub. Or you can continue until you feel ready to share your code :)
# Translators: edit translators.csv
# same as above, but the order of columns is:
# Language, i18n code, Name, Country, Email, Osgeo_id
#  - Order alphabetically by language, then by first name
#  - remove punctuation from email addresses to stop harvesting for junk mail
Working with files:
# to add a file
cd <dir>
# create a file
git add <file>
git commit -m "commit message"
git push origin master
# to move or rename a file
#  *** please use instead of 'svn add' + 'svn rm', otherwise the
#      development history gets lost and database space is wasted ***
git mv <old filename> <new filename>
git commit -m "commit message"
git push origin master
Last step: pull request
In order to merge your work with the main repository, you have to make a pull request.
You can do it by logging on your github account and go to the branch you changed. Click on the New pull request green button. The changes you made previously while appear.
You can review and comment your request before submitting. To submit, click on the Create pull request green button. Then, you're done ! Good job !
More information about Github pull request here: https://help.github.com/articles/using-pull-requests/
Subversion
- Repository
- https://svn.osgeo.org/osgeo/livedvd/gisvm/trunk and web view
- On Linux systems: access Subversion using:
svn checkout https://svn.osgeo.org/osgeo/livedvd/gisvm/trunk
- On MS Windows systems, install Tortoise Subversion, which extends Windows Explorer to include subversion commands.
- Commit access
- To get commit access, you need to create yourself an osgeo user id, then join our email list and ask to be given access to subversion. In this email, you will also need to confirm that you will comply with our license guidelines. Write something like:
- "Hi all, I'd like to contribute XXX to OSGeoLive. Could I please get access to subversion. My osgeo-user id is: YYYY.
- I confirm that my contributions to OSGeoLive will be compatible with the OSGeoLive license guidelines at the time of contribution."
- The licenses used for the OSGeoLive build scripts and documentation are:
- Creative Commons Attribution-ShareAlike 3.0 Unported License for Quickstarts
- Creative Commons Attribution 3.0 Unported License for Project Overviews
- LGPL version >=2.1 for the install scripts
- One of the OSI approved Open Source licenses for installed applications
- Public domain, CC-By-SA, and Open Data Commons Open Database License (ODbL) for data
- A project admin will then add you to the osgeo user group.
- Add your name to contributors list
- The first thing you should do to test your svn install is to add your name the code contributors or translators list(s):
cd trunk/doc
# to edit a file
svn update contributors.csv translators.csv
# Coders and creators of new content: edit contributors.csv
# please add your Name, Email, Country and Osgeo_id to the list, separated by comma
#  - Order alphabetical by first name,
#  - remove punctuation from email addresses to stop harvesting for junk mail

# optionally check to see what has changed.
svn diff contributors.csv

# check the file back into subversion
svn commit contributors.csv
# Translators: edit translators.csv
# same as above, but the order of columns is:
# Language, i18n code, Name, Country, Email, Osgeo_id
#  - Order alphabetically by language, then by first name
#  - remove punctuation from email addresses to stop harvesting for junk mail
Working with files:
# to add a file
cd <dir>
# create a file
svn add <file>
svn propset svn:mime-type <mime.type> <file>
svn commit <file>
# to move or rename a file
#  *** please use instead of 'svn add' + 'svn rm', otherwise the
#      development history gets lost and database space is wasted ***
svn move <old filename> <new filename>
svn commit <file>
- A script to automatically set the svn props can be found here. More SVN hints here.
- On MS Windows this can be made easy using Tortoise SVN which plugs directly into Windows Explorer.
FAQ
Code of Conduct
Within the OSGeoLive community we act respectfully toward others in line with the OSGeo Code of Conduct.
Press Releases
- 7 November 2017, Live GIS Disc Press Release 81 - OSGeoLive enters OSGeo Incubation
- 23 October 2017, Live GIS Disc Press Release 80 - Calling for Alpha testers for Transifex translations
- 9 August 2017, Live GIS Disc Press Release 79 - OSGeoLive 11.0 released
- 4 July 2017, Live GIS Disc Press Release 78 - OSGeoLive 11.0 - Need help translating and testing
- 30 May 2017, Live GIS Disc Press Release 77 - What's in the OSGeoLive 11.0 reboot?
- 4 May 2017, Live GIS Disc Press Release 76 - Which applications should be included on OSGeoLive 11.0?
- 17 April 2017, Live GIS Disc Press Release 75 - Starting build cycle for OSGeoLive 11.0 - Descoping for this release
- 10 April 2017, Live GIS Disc Press Release 73 - OSGeoLive 10.5 released
- 28 March 2017, Live GIS Disc Press Release 74 - Dropping broken projects from OSGeoLive
- 28 February 2017, Live GIS Disc Press Release 72 - OSGeoLive 10.5 - Is your project broken?
- 21 February 2017, Live GIS Disc Press Release 71 - OSGeoLive 10.5 - Call for testers
- 3 August 2016, Live GIS Disc Press Release 70 - OSGeoLive 10.0 released
- 30 June 2016, Live GIS Disc Press Release 69 - OSGeoLive 10.0 - Call for testers and translators
- 4 June 2016, Live GIS Disc Press Release 68 - OSGeoLive 10.0 alpha ready to test
- 10 May 2016, Live GIS Disc Press Release 67 - Starting build cycle for OSGeoLive 10.0
- 22 March 2016, Live GIS Disc Press Release 66 - OSGeoLive 9.5 released
- 07 March 2016, Live GIS Disc Press Release 65 - OSGeoLive 9.5 - Call for testers and translators
- 03 February 2016, Live GIS Disc Press Release 64 - Projects being considered to be retired from OSGeoLive
- 01 February 2016, Live GIS Disc Press Release 63 - OSGeoLive metrics going public in next release
- 23 November 2015, Live GIS Disc Press Release 62 - Starting build cycle for OSGeoLive 9.5
- 10 September 2015, Live GIS Disc Press Release 61 - OSGeoLive 9.0 released
- 27 August 2015, Live GIS Disc Press Release 60 - Final OSGeoLive 9.0 testing sprint
- 19 May 2015, Live GIS Disc Press Release 59 - Starting build cycle for OSGeoLive 9.0
- 22 February 2015, Live GIS Disc Press Release 58 - OSGeoLive 8.5 released
- 2 February 2015, Live GIS Disc Press Release 57 - Final OSGeoLive 8.5 testing sprint
- 1 February 2015, Live GIS Disc Press Release 56 - One week to translate OSGeoLive 8.5 Documentation
- 10 November 2014, Live GIS Disc Press Release 55 - Starting build cycle for OSGeoLive 8.5
- 26 August 2014 8.0 Errata - Post release issues
- 25 August 2014, Live GIS Disc Press Release 54 - OSGeoLive 8.0 released
- 8 August 2014, Live GIS Disc Press Release 53 - Final OSGeoLive 8.0 testing sprint
- 28 July 2014, Live GIS Disc Press Release 52 - OSGeoLive Testing and updating Project Overviews and Quickstarts
- 11 July 2014, Live GIS Disc Press Release 51 - OSGeoLive at FOSS4G-Europe Code Sprint
- 4 May 2014, Live GIS Disc Press Release 50 - Starting build cycle for OSGeoLive 8.0
- 14 April 2014, Live GIS Disc Press Release 49 - OSGeoLive and Heartbleed vulnerability
- 12 March 2014, Live GIS Disc Press Release 48 - OSGeoLive 7.9 released
- 19 February 2014, Live GIS Disc Press Release 47 - Two weeks to translate OSGeoLive Documentation
- 14 February 2014, Live GIS Disc Press Release 46 - Final OSGeoLive 7.9 testing sprint - call to action
- 27 January 2014, Live GIS Disc Press Release 45 - Update OSGeoLive Project Overviews and Quickstarts
- 20 December 2014, Live GIS Disc Press Release 44 - Starting build cycle for OSGeoLive 7.9
- 30 August 2013, Live GIS Disc Press Release 43 - OSGeoLive 7.0 released
- 23 August 2013, Live GIS Disc Press Release 42 - Final OSGeoLive testing sprint this weekend
- 19 July 2013, Live GIS Disc Press Release 41 - Update OSGeoLive Project Overviews and Quickstarts
- 16 May 2013, Live GIS Disc Press Release 40 - Starting build cycle for OSGeoLive 7.0
- 20 February 2013, Live GIS Disc Press Release 38 - OSGeoLive 6.5 released
- 18 February 2013, Live GIS Disc Press Release 39 - OSGeoLive Quickstart Hackaton - Results
- 26 January 2013, Live GIS Disc Press Release 37 - OSGeoLive Quickstart Hackaton Weekend
- 24 January 2013, Live GIS Disc Press Release 36 - Two weeks to translate OSGeoLive Documentation
- 20 January 2013, Live GIS Disc Press Release 35 - OSGeoLive Project Overview deadline in 3 days
- 18 January 2013, Live GIS Disc Press Release 32 - Targeting OSGeoLive Quickstarts for OSGeoLive 6.5
- 18 December 2012, Live GIS Disc Press Release 34 - Update OSGeoLive Project Overviews and Quickstarts
- 3 December 2012, Live GIS Disc Press Release 33 - One week to tell us to include your app on OSGeoLive 6.5
- 9 November 2012, Live GIS Disc Press Release 31 - What version of applications should we be installing on OSGeo-Live 6.5?
- 31 October 2012, Live GIS Disc Press Release 30 - Starting build cycle for OSGeoLive 6.5
- 20 August 2012, Live GIS Disc Press Release 29 - OSGeoLive 6.0 released
- 2 August 2012, Live GIS Disc Press Release 28 - All OSGeoLive java applications now working with OpenJDK 7
- 30 April 2012, Live GIS Disc Press Release 27 - Starting build cycle for OSGeoLive 6.0
- 1 March 2012, Live GIS Disc Press Release 26 - OSGeoLive 5.5 released
- 16 January 2012, Live GIS Disc Press Release 25 - Update OSGeoLive 5.5 docs & installer
- 17 December 2011, Live GIS Disc Press Release 24 - What version of applications should we be installing on OSGeo-Live 5.5?
- 1 November 2011, Live GIS Disc Press Release 23 - Call for interest in OSGeoLive 5.5
- 30 August 2011, Live GIS Disc Press Release 22 - OSGeoLive 5.0 released
- 2 August 2011, Live GIS Disc Press Release 21 - Calling for OSGeoLive Testers
- 18 July 2011, Project Overviews & Quickstarts for New Zealand's SDI Cookbook
- 9 July 2011, Live GIS Disc Press Release 20 - One week to update of OSGeoLive English Overviews and Quickstarts
- 17 June 2011, Memoirs of a Cat Herder - Coordinating OSGeoLive volunteers
- 4 June 2011, Live GIS Disc Press Release 19 - Last call for new projects wishing to be included on OSGeoLive
- 8 May 2011, Live GIS Disc Press Release 18 - Call for interest in OSGeoLive 5.0
- 28 March 2011, Live GIS Disc Press Release 17 - OSGeoLive 4.5 released
- 25 February 2011, Live GIS Disc Press Release 16 - OSGeoLive 4.5 ready for testing
- 13 February 2011, Live GIS Disc Press Release 15 - Two weeks to write Quick Starts
- 13 February 2011, Live GIS Disc Press Release 14 - Two weeks to translate Project Overviews
- 14 January 2011, Live GIS Disc Press Release 13 - Last call for projects to be included on OSGeoLive 4.5
- 11 December 2010, Live GIS Disc Press Release 12 - Contact application contacts
- 23 November 2010, Live GIS Disc Press Release 11 - Goals and schedule for OSGeoLive 4.5
- 3 September 2010, Live GIS Disc Press Release 10 - Video & DVD for OSGeoLive 4.0, the best GeoSpatial OpenSource
- 13 August 2010, Live GIS Disc Press Release 9 - Testing OSGeoLive on the USB
- 3 August 2010, Live GIS Disc Press Release 8 - 1 week to test the OSGeoLive DVD
- 21 July 2010, Live GIS Disc Press Release 7 - OGC and OSGeo collaborate on documentation
- 27 June 2010, Live GIS Disc Press Release 6 - 1 week till OSGeoLive Feature Freeze
- 10 June 2010, Live GIS Disc Press Release 5 - Building OSGeoLive DVD for FOSS4G 2010
- 31 March 2010, Live GIS Disc Press Release 3 - Arramagong Live DVD 3.0 released
- 24 March 2010, Live GIS Disc Press Release 4 - LiveDVD project joins Google Summer of Code
- 14 January 2009, Live GIS Disc Press Release 2 - 3 weeks to Live DVD 3.0 feature freeze
- 16 December 2009, Live GIS Disc Press Release 1 - Defining the next LiveDVD/VM
- FOSS4G 2009 Press Releases
- 16 October 2009, FOSS4G 2009 Press Release 35 - LiveDVD/VM on click2try Cover Email
- 3 October 2009, [1] Arramagong GIS Live DVD - off to printers
- 6 September 2009, FOSS4G 2009 Press Release 29 - What Windows installers should be on the FOSS4G Live DVD + Live DVD Status.
- 27 August 2009, FOSS4G 2009 Press Release 28 - Simple steps to get your project on the FOSS4G Live DVD
We also announce press releases on twitter.
- Major Builds
- Calls for Testing
- Calls for Translation
- Retweets of events featuring OSGeoLive
Twitter Account
- https://twitter.com/osgeolive/
- Administrated by User:Astrid Emde, Alex and Brian have access too
History
Testimonials
Project Metrics
- Metrics from Open Hub (former Ohloh): https://www.openhub.net/p/OSGeo-Live
- https://live.osgeo.org/en/metrics.html
- Transifex OSGeoLive Translation Stats: https://www.transifex.com/osgeo/osgeolive/languages/
Google Summer of Code
OSGeo Incubation
Use Cases
There are multiple use cases for this product:
- Demo DVD/USB that can be handed out at conferences.
This will contain a wide variety of applications, preconfigured with some sample data and containing introductory tutorials. It should be able to function completely offline, at least within the scope of the tutorials, and should provide an introduction to many products. This is very much a Live DVD, and as such should be conservative with regards to size (it will be run from RAM). - Education DVD
This seems to be a more involved version than the Demo DVD, including more involved material, including train-the-trainer style material. This is targeted at those who will be teaching others, be it in workshops or university classes/labs. My expectation (mleslie: feel free to correct me) is that this is more likely to be installed on machines and used as a teaching resource, as opposed to a toy to play with, as with the Demo DVD. This will require material developed through the. - Workstation Install DVD
This need was seen in Cape Town, where the bandwidth seems to be a very limiting factor. Using the DVD to install either a complete OS, a set of packages to an existing Linux, or Windows installers completely offline is of great value in the developing world. Would it be of greater value to lose the Edu or demo material and put in complete application documentation?
- DebianGIS. We encourage projects to package applications into Debian, which in turn is incorporated into Ubuntu.
- UbuntuGIS
- Enterprise Linux GIS packages as RPMs for redhat based systems.
- GISVM home page (GIS Virtual Machine by Ricardo Pinho)
- DebianGIS Live Image
- Omniverdi LiveCD project
- List of live CDs from the GRASS download site
- Gfoss.it live DVD
- Portable GIS - Zero-install GIS for MS Windows on a USB stick
- Poseidon Linux
- GISLive - LiveDVD project from FOSSGIS e.V. (German language)
- GIS.lab - Automatic deployment of GIS infrastructure
Links to Build tool options
- The live-helper package - DebianLive home page
- Debian\Ubuntu Tricks
- Ubuntu Help Way